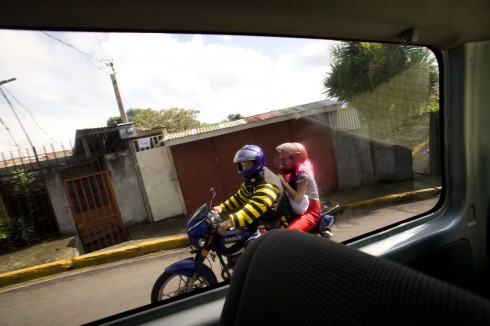
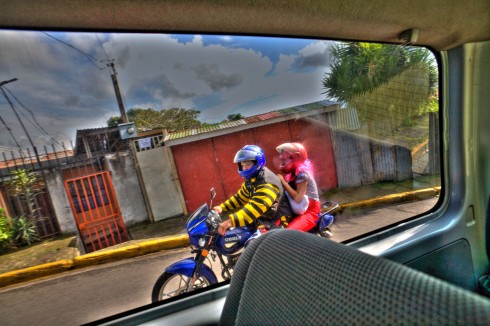
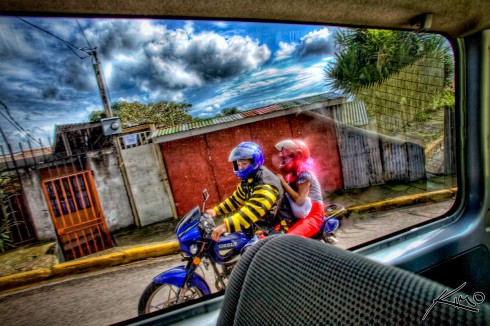
The three photos below is a result of me shooting from within a moving bus. The camera was hand held and the clowns were riding a moving scooter. Not the ideal situation for shooting HDR!


The photo below is a perfect candidate for creating a HDR photo. Notice the blown out sky and the extremely dark foreground. HDR will bring back colors in the sky and the details in the foreground.
There are two techniques for creating a
single exposure HDR photograph.
1.Technique One (For them who owns DSLR)
Photomatix will allow you to tone map a single RAW file to create a pseudo HDR image. You can do this simply by opening your RAW file in Photomatix. Once your RAW file is open you will be able to tone map your photo into a HDR image like you would normally.
 |
Personally I don’t use this technique because Photomatix doesn't have any way of separating the light areas from the dark areas. This results in a very flat image with little definition. That’s why I prefer the second technique, which does a much better job of creating a single exposure HDR photograph.
2.Technique Two (For any Digicam or even mobile phone with at least 8Mp)
The second technique is my preferred method. I developed this technique because I was unhappy with the results of the first process. This method allows me to tell Photomatix how to separate the light and dark areas. I do this by manually creating my light and dark exposures from the single photo selected above. These exposures are created in Photoshop using the RAW converter. Below is a step-by-step tutorial to show you how to create your exposures.
Step 1 – Opening RAW in Photoshop
When you open your RAW image in Photoshop you get the Camera RAW window. This window will allow you to adjust your exposure. This is how we will be able to create our digital exposures.
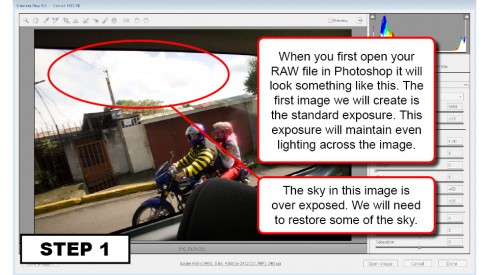 |
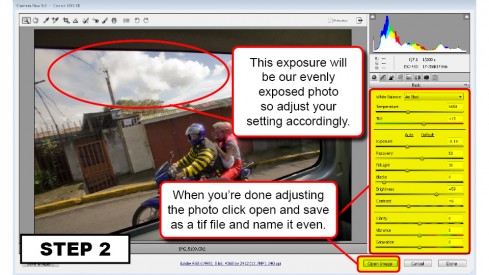
Step 2 – Saving Your First Exposure
The first exposure we will create is our standard exposure. Adjust your settings so that this exposure is evenly lit across your entire image. Click on open image once your done adjusting the exposure. Save that file as a TIF file. You should name it EVEN or anything that will remind you that this file is the evenly exposed photo.
 |
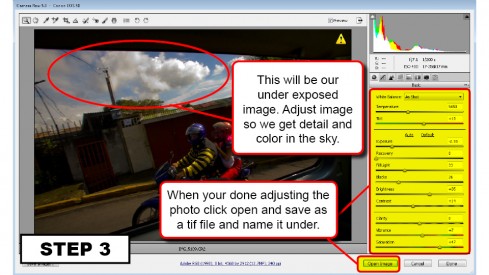
Step 3 – Creating Your Under Exposed Image
The second exposure we will create is our under exposure. Adjust your settings so that this exposure is underexposed by 2 stops. Focus on getting any over exposed areas dark with color and detail. Click on open image once your done adjusting the exposure. Save that file as a TIF file. You should name it UNDER or something that will remind you that this file is the under exposure.
 |
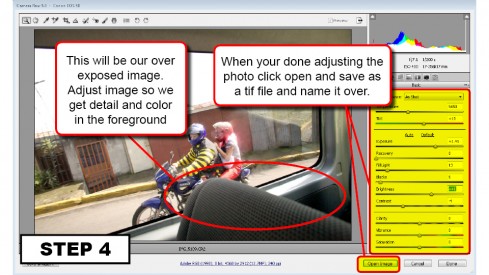
Step 4 – Creating Your Over Exposed Image
The third exposure we will create is our over exposure. Adjust your settings so that this exposure is over exposed by 2 stops. Focus on getting detail in your dark areas, mainly the foreground. Click on open image once your done adjusting the exposure. Save that file as a TIF file. You should name it OVER or something that will remind you that this file is the over exposure.
 |
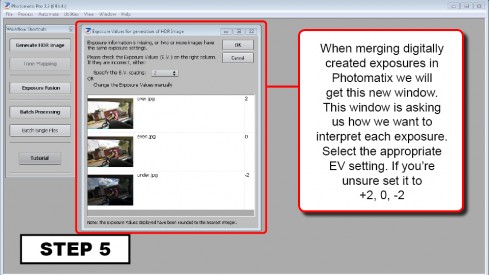
Step 5 – Merging Your Exposures in Photomatix
Once you are done creating your exposures you can use them to create your HDR image in Photomatix. Proceed like you normally would when creating your HDR photo. You will get a new window were you will need to input EV settings. Set them to 2, 0, -2 if you aren’t sure.
 |
Step 6 – Tone Map, Process, Save and You’re Done
Proceed to tone map your image like you normally would. Once you’re satisfied with your tone mapping, process your HDR image, save it and you’re done. Most likely you’ll need to run your image through Topaz DeNoise cause single exposure HDR is notorious for producing grainy images.
 |
That’s it for this tutorial. I hope this information on single exposure HDR was helpful. Drop me a comment if you have any questions.

0 comments:
Post a Comment